Holy Paladin Guide for 4.3 Normal Modes
This is a Holy Paladin guide for Dragon Soul normal mode healing made based on our ptr experience. Enjoy.
Set bonuses: 2pc is not terribly good, but since the last tier’s 4pc benefits spells that will be seeing less use, there is no problem with switching. The new 4pc is a large boost for the fights where you will use HR, especially Ultraxion.
Changes from 4.2 to 4.3: You will need to judge less often and use HR more often. I switched their places in my keybindings (R and space). Still, try not to let Judgements of the Pure fall off, especially since it also effects your regen now and you are less likely to have the extended judgment rage.
Don’t cast HR twice in a row on the same player to make sure you don’t lose any ticks and obviously always cast it on someone who is in a big group. The one in the group can be you if you can’t trust anyone else to be there.

Introduction: Holy paladins do well on this boss. There is heavy damage on multiple players and you are allowed to stack up, so Holy Radiance (HR) and Light of Dawn (LoD) are effective. Divine Protection and the sprint attached to it also allow you to easily cover for soakers if they make a mistake. Both tanks take damage throughout the fight, but you might have to keep track of who is taking the melee hits and needs more healing.
Spec: You can choose your spec freely as you won’t need a magic dispel, aura mastery (might be slightly useful for soaking Orbs) or extended judgment range.
Glyphs: I would recommend 40 % magic Divine Protection and Holy Shock (HS) glyphs.
The fight and tips: Morchok’s stomp is the key mechanic that limits your position to a certain range from the boss. The range check seems to be slightly buggy, as I was standing within a 15 yard judgment range and didn’t get hit by the supposedly 20-30 yard stomp (you are supposed to get hit). Try to position yourself inside a big group for efficient healing while making sure you’re not the closest one to the boss.
If you are assigned to soaking Twilight Orbs, use your DP and sprint close to the Orb (beam attached to you turns blue). After the Orb explodes, heal the soakers up fast with LoD and HR or Divine Light (DL) so they don’t die from stomp.
The phase where Morchok starts channeling black goo if good for using Divine Plea as no one should be taking damage. Make sure you run far enough (don’t stand behind the closest rocks) and keep an eye out for the beginners that might need healing.
At 20 % health Morchok starts doing more damage, especially to tanks, so you might want to pop your cooldowns and keep an eye out for the tanks even if you are mainly healing the raid.

Introduction: Holy paladins are competitive but not especially good on this boss. The type of damage is somewhat random and at times your mana gets stolen, which is not good for paladins as we don’t have any HoTs or shields to use before losing our mana.
Spec: Dispel isn’t needed. Aura mastery might theoretically be useful, but all the phases last so long that you probably won’t even notice it.
Glyphs: Consider using the word of glory glyph if you see yourself using the spell often. Glyph of Divinity might be useful for when you lose your mana.
The fight and tips: I won’t go through ever possible combination of boss skills the boss gets from the bloods he sucks, but instead I’ll list some tips for each one. When the blood spawn, remember that you don’t have to run with the dps, you can stay and melee the boss for some mana instead if needed.
Yellow: Since this one makes the other skill more powerful, its effect varies a bit. However, it will always make the tanks take more damage so keep an eye on their health.
Blue: When boss starts draining your mana, you still have time to cast a couple of spells. Use Flash of Light if needed. After the mana draining debuff ends, you can use Divine Plea or Arcane Torrent or Mana Potion to gain mana. You can also use Hand of Sacrifice. When the blue orb is about to die, be sure to be close enough so you get your mana back.
Red: Heal the players taking damage with Divine Light.
Dark: The adds do little damage, so don’t worry about it.
Green: Stay out of the green cloud and spread out 4 yards from others. Heal as needed.
Shadowed: It’s uncertain which heals will add a stack on the target.

Introduction: Holy paladins do well on this boss as well. The boss mechanics force the raid to stay in tight groups which again makes HR and LoD powerful. Beacon won’t be as useful because it does not transfer HR.
Spec: Aura mastery and dispel are both useful for this boss. Of course if you can get someone else to do the dispelling, you won’t need the magic dispel.
Glyphs: I would recommend 40 % magic Divine Protection and Holy Shock (HS).
The fight and tips: The most demanding aspect of the battle is positioning. You have to make sure you are close enough to the orb to share the damage but you also need to move when the raids wants the orb to hit the boss. Take care not to stand in front of the boss. Being with the ranged group allows you to use LoD more easily but staying in melee is also possible if needed.
If you aren’t raid healing, try to heal players who get the Disrupting Shadows debuff before they get dispelled or before you dispel the debuff from them (the dispel causes about 60k damage). Coordinating raid healing, healing the debuffed players and dispelling with other healers is useful.
When the orb hits the boss, the boss will channel heavy aoe damage so pop your Avenging Wrath (AW) and/or Divine Favor (DF) especially if the raid is low. Use HR and don’t forget to use LoD when you get 3 holy power. At the beginning of this heavy aoe damage you should have a holy paladin use aura mastery with a resist aura if the damage is resistable.

Introduction: Paladins are good on this fight due to our strong cooldowns and good survivability.
Spec: Dispel not needed, aura mastery isn’t that useful. Extended judgment range might benefit your slightly.
Glyphs: I would recommend 40 % magic Divine Protection.
The fight and tips: When the boss casts Shattered Ice, check who the boss is targetting and heal them. Your tank should be able to survive Focused Assault, but it does cause a significant damage spike so use WoG and Flash of Light if needed to help the tank survive. Pay attention to the Ice Tomb timer because you only get a small blue arrow above yourself if you are going to be hit with it. Ice Tombs also block line of sight, so take care to have the tank in your line of sight.
When the boss is stunned use DP and melee him from mana if needed and leave the healing to priests and druids.
Healing wise the snow phase (Frozen Tempest) is easier, but you have to pay more attention to your surroundings. Run in the inner circle close to Hagara’s water shield, avoid ice falling from above and use Divine Protection to sprint if needed and Divine Shield if you are about to hit the Ice Wave behind you. The Ice Wave behind you is closer than it looks.
In the lightning phase (Lightning Storm) use HR and LoD to heal the raid as long as you are in a tight group. After that you should be standing in wherever you have range to others when the adds are being moved and using all your cooldowns to make sure that you can keep everyone you have in range alive.

Introduction: Paladins are by far the best healers for Ultraxion because of the heavy aoe damage. You’ll be using HR, LoD and HS almost exclusively.
Spec: Aura mastery is probably useful when the heavy damage comes. Dispel or judgment range not needed.
Glyphs: I would recommend 40 % magic Divine Protection and Holy Shock (HS). Ascetic Crusader might be useful.
The fight and tips: The damage ramps up over the fight. Use more LoD and less HR in the beginning to conserve your mana. You can generate holy power for LoD with HS and Crusader Strike (CS). Your rotation might be HR+HS+CS->LoD. Since paladins are the most powerful aoe healers, let the other healers worry about healing the tanks (don’t move beacon from tank to tank). As the fight goes on, you should first drop CS from your rotation and then possibly drop HS during the last minute, leaving you with 3xHR->LoD. Simple HR spamming is slightly more HPS but it’s not a smart heal so I recommend using LoD at 3 holy power. Make sure you enter the last minute of the fight with as much mana as possible by using divine plea a bit earlier.
You should follow the cast bar for Hour of Twilight. You still have time to cast a heal or two before you have to use Heroic Will. Don’t take unnecessary risks.
Red, Green and Blue buffs are all very useful to a paladin. Sprint to get the buff with Divine Protection, but make sure you don’t turn back before you get it. Druids and shamans take the full benefit from the green one (presumably the extra heal does not give the target Illuminated Healing from out mastery). Red and Green don’t change the way you heal but the blue does by reducing the mana cost of your heals. You still might not have enough mana to spam only HR, though.

Introduction: Paladins are decent on this fight. Divine Protection is very useful.
Spec: Aura mastery might be useful, magic dispel not needed.
Glyphs: 40 % magic Divine Protection. Consider using the word of glory glyph if you see yourself using the spell often.
The fight and tips: The humanoid adds charge and warn about it by leaving a small trail on the ground. Avoid if you can, but it’s not required. As usual, the sprint from DP is useful. Don’t try to get to every Twilight Barrage because you need to heal too.
After Twilight Onslaught use one HR and LoD before spreading out again. Usually you will be using DL and WoG on this fight.
At the start of phase 2 is the best time to use your cooldowns, including Divine Shield (once you get the flames on you). After Goriona stops breathing on you you should be able to heal without cooldowns. Note the increasing damage to the tank towards the end and stay out of melee range while avoiding. You’ll have plenty of time to heal the melee between roars so your first priority is the tank.
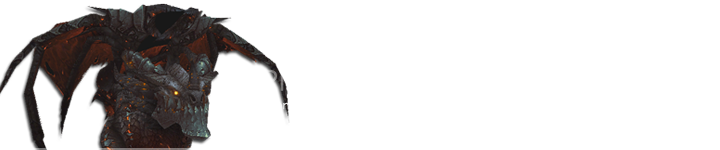
Introduction: Paladins are again good. It’s hard to compare performance between healers due to the healing absorbing debuff.
Spec: Aura mastery is useful, magic dispel is not needed.
Glyphs: WoG and Beacon glyphs might be useful if you cast them often.
The fight and tips: Start by standing on the side that you will make Deathwing roll to so you don’t have to worry about when to move to the side. Stand near a corruption tentacle or its hole. Just before the bigwigs roll timer hits 0, enter the hole with aura mastery and Divine Protection active and leave as soon as the timer disappears. Then stand in the middle, away from the plate your raid is trying to remove.
Depending on the number of Searing Plasma debuffs on the raid you should use HL, DL or HR and of course LoD. Especially after the very first barrel roll you might choose to use HR because nearly everyone probably has the debuff. If only a few people have it, you should use single target heals. Depending on how fast Searing Plasma is removed, you might want to put beacon on one target with a (new) debuff and heal another target. Don’t be overzealous when it comes to removing Searing Plasma and conserve some mana for the heavier damage that comes later from the adds.
Be fast when healing people who get Fiery Grip if they are low on health or have Searing Plasma. There is also a large responsibility with your damage dealers to interrupt it with damage as fast as possible. If you get 3 ticks they’re certainly too slow. When Hideous Amalgamation becomes Superheated and starts doing aoe damage, use a cooldown (AW or DF, possibly Aura Mastery if the damage is resistable) and cast aoe heals.
 With this guide you should always be aware of what to do on a specific boss. Still don't forget to discuss the boss mechanics with your other healers and go through the healing arrangements for each fight. That's how you'll get the most out of the healing kit your raid has.
- Log in to post comments